Showing posts with label cookies. Show all posts
Showing posts with label cookies. Show all posts
Wednesday, September 24, 2014
Almond Covered Thumbprint Cookies

I once heard about a book that espoused a particularly appealing version of the "balanced diet" approach to weight loss. Say you want to have a milkshake? Well, it advised, have a milkshake! Just have a small one. And not every day. And accompany it with a big pile of steamed broccoli, and call it dinner.
At the time, I remember thinking that sounded great. Not as some sort of balanced system of penance and reward — simply because I like both of those items a whole lot, and a meal composed of the two would be across-the-board wonderful. Its often what I default to, especially when nobody else is around to mitigate. To whit: for a recent solo dinner, I ended up roasting and eating a pound of Brussels sprouts, followed by a few fresh-from-the-oven buttery, jammy cookies. And it was great.
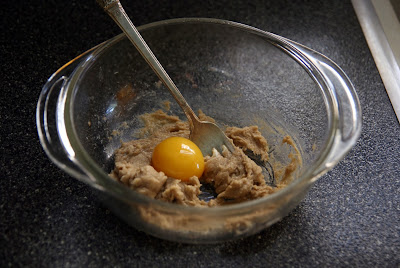
I recommend these cookies as part of anyones balanced brassica-filled meal. Ive made thumbprint cookies before of a more hippie, oat-and-whole-grain-filled sort. I like that variation, but these have a buttery simplicity thats hard to beat. A rich, plain short dough, rolled in almonds that toast up in the oven, then filled with jam (in this case, a runny undercooked raspberry version Id made, which was perfect for the task). Even without the Brussels sprouts, they more than hold their own.

Almond-Covered Thumbprint Cookies
adapted from Nikole Herriott, via Lottie and Doof
yields ~20 cookies
1/2 cup (1 stick) unsalted butter, softened to room temperature
1/2 cup white sugar
1 egg, separated (I used two smallish eggs, which worked great)
1 teaspoon vanilla
1 1/4 cups all purpose flour
scant 1/2 teaspoon coarse salt
3/4 cups raw almonds, chopped (you want them small enough to adhere to cookies, but big enough to provide a nice bite)
~ 1/4 cup jam of your choosing (raspberry is especially nice)
Preheat your oven to 325° Fahrenheit. Line two baking sheets with parchment, or grease them well.
In the bowl of a stand mixer fitted with the paddle attachment, cream the butter and sugar together until well-mixed and fluffy. Add the egg yolk and vanilla, and beat until well mixed. Stir in the flour and salt, and mix until the dough just comes together (you can add a spoonful of water if needed).
Scoop your dough out into generous tablespoons and roll into balls (you should have about 20). Lightly whisk the egg whites, and places the almonds in a shallow bowl. Roll each dough ball in the egg whites to coat, then in the chopped almonds (you can use a little pressure if needed to make them adhere). Place the cookies on sheet, with a bit of space between them (they shouldnt spread all that much).
Press on each cookie, to flatten into a chubby disk. Using your thumb, or the handle of a wooden spoon, make a nice wide intent in the center of each cookie. Spoon a bit of jam into each indent (you may not be able to fit much more than a generous 1/4 teaspoon). Bake in the preheated oven until just beginning to turn lightly golden, ~15 minutes, then transfer to racks to cool. Best eaten in the first day or two.
Friday, September 12, 2014
Korova Cookies aka World Peace Cookies gluten free

I dont usually do that much gluten-free baking. But for world peace, I make an exception.
Recently the lovely blog Gluten-Free Girl and the Chef posted something of a road map of the journey you take in gluten-free baking (and gluten-free living). Living gluten-free is about learning the ins and outs of a whole new palette of starches. And its a hefty palette -- different gluten-free starches have different properties, so if you want something that binds, aerates, flakes, and all that good stuff, youre going to have to combine a variety of ingredients and techniques. I dont have too much experience with the gluten-free pantry pantheon, so when I want to bake for gluten-free friends, I usually turn to tried-and-true recipes, and follow them exactly.
But last week, Gluten-Free Girl and the Chef threw down the gauntlet. Well, the friendly, collaborative sort of gauntlet. After an uncharacteristically spectacular recipe failure, they solicited feedback in developing a gluten-free version of Korova Cookies, also known as World Peace Cookies. Their version turned into a melty mess on the cookie sheet, and so they asked for thoughts, comments and suggestions as to how to come up with a dough that more closely resembled its inspiration.
The cookies in question are a chocolatey-salty version of buttery sablés. These French cookies are so named for their sandy texture, sort of like a crumbly shortbread. In this version, developed by the failsafe Dorie Greenspan, theyre given a shot of cocoa powder, some chopped chocolate and a hefty dose of salt, and according to her neighbor they might just be the secret to world peace. Who could say no?
As any gluten-free baker knows, developing a crumbly texture isnt usually much of a problem. I turned to the somewhat nubbly rice flour as the main ingredient, with some tapioca starch and sorghum along too, and a teensy bit of xanthan gum to bind (this ingredient can be found at most health food stores, but can also be easily obtained from any of your gluten-free friends in exchange for the promise of cookies). Gluten-free sablés need a bit of structure to stand up to all that butter, but not at the expense of their crumbly short texture. I turned to egg yolks, removed from their more structurally-solid whites. I also swapped out some of the butter for an ingredient that may seem strange: hard-boiled egg yolks.
I first saw hard-boiled yolks used in a strawberry shortcake recipe last summer, and it turns out that theyre not all that uncommon, and are even used in some traditional sablé recipes. They lend a delicious richness, but without the water content and binding properties of raw yolks, or the melting potential of butter. I was aiming to try a few variations, but after a spectacular cookie disaster of my own (more on that later), I was pretty cookied out, and just made the one. But the gluten-free gods seem to have smiled, because it was indeed the one. Chocolatey and salty (in a way that seems to deepen the chocolate flavor), with a delicate texture. World peace to follow? We can only hope.

Korova Cookies (aka World Peace Cookies), gluten-free
adapted from the World Peace Cookies in Dorie Greenspans Baking: From My Home to Yours, inspired and informed by Gluten-Free Girl and the Chef
yields ~28 cookies
1/2 cup rice flour
1/3 cup sorghum flour
1/3 cup tapioca starch
1/3 cup cocoa powder
1/2 tsp baking soda
1/2 tsp xanthan gum
1 stick butter, softened to room temperature
2/3 cup brown sugar
1/4 cup sugar
1/2 tsp coarse salt (fleur de sel if youve got it, kosher salt if youre me), or a heaping 1/4 tsp regular salt
1 tsp vanilla extract
2 hard-boiled egg yolks
2 raw egg yolks
1/2 cup chopped chocolate, or 3/4 cup mini chips (if using the latter, chop a few up into scraps, to get those little bits that will melt into the batter and make it all the better)
Sift together the rice flour, sorghum flour, tapioca starch, cocoa powder, baking soda, and xanthan gum. Set aside.
In a mixer, cream together the butter with the brown sugar and sugar until theyre light and fluffy. Add the salt, vanilla, and crumble in the hard-boiled egg yolks. If youre mixing by hand, you may want to pass the yolks through a seive to make sure they are broken up into small pieces, but with a mixer and the granular sugar, you should be fine. Mix another minute or two, until the mixture is well-combined and fluffy. Add the raw yolks, and stir until just combined.
Add your dry ingredients, mixing until they are completely incorporated. Mix in the chopped chocolate until it is evenly dispersed. Lay out a piece of plastic wrap or waxed or parchment paper (or, if youre me, a cut-open plastic bag because you dont seem to have either of the other items). Take half the dough, shape it into a chubby sausage with a 1 1/2" diameter, and wrap it tightly in your covering of choice. Repeat with the remaining dough. Refrigerate overnight.
The next day, preheat your oven to 325 degrees farenheit. Line two baking sheets with parchment or silicone mats, if youve got them (or else just grease them well and hope for the best).
Take out one of your dough tubes, and slice the cookies into hefty 1/4" discs (I might have been closer to 1/3"). Set the rounds of dough onto one of the prepared sheets, leaving a few inches between (they will spread). Bake 12 minutes -- the cookies should be set enough to have something of a crust, but they will not be close to being firm or done. Remove, and let cool on the sheets. Repeat with remaining disc. The cookies will remain slightly soft when warm, but firm up upon cooling. Theyre delicious either way.
Saturday, September 6, 2014
Baby Shower Cookies aka Sugar Cookies with Royal Icing

There comes a time in life when it seems like almost everyone you know is having babies. At first, it kind of floors you every time you hear the news, and you struggle to come up with a gift commensurate to the occasion. In years past, I crafted ornate homemade cards, cooked obscene amounts of food, and stitched patchwork quilts and a stuffed pink satin armadillo. But as more and more friends began to have babies, I realized that keeping up with that sort of gifting protocol could quickly become a second job. I started turning to the gift registry, pairing a cotton onesie with a heartfelt card and calling it a day. For the most part, this seems appropriate. But every now and then, I hear about the pregnancy of a friend who is so dear that the registry just doesnt cut it. I start looking around for a more personal way to share the love. And recently, I hit upon these baby shower cookies.
Having never made gingerbread houses as a kid, I was pretty new to the world of royal icing. This sweet-yet-structural topping combines powdered sugar with egg whites or meringue powder, and is versatile enough to pipe intricate designs yet sturdy enough to be shipped across the country in a pre-baby care package. And its fun. Arts and crafts such as these are sadly in short supply in adulthood. Although my own journey with these cookies took three attempts (due to some boneheaded mistakes on my part that are too embarrassing to detail, namely refusal to read ingredient listings and refusal to use a timer), theyre really not that hard. I piped my royal icing with a pastry cone I taped out of scratch paper, and although the resulting designs are somewhat "rustic," nobody complained. The hardest part of the whole process is the waiting, from chilling the cookies to letting the icing set. Its one of the sweetest ways Ive come up with to welcome the good news.


Baby Shower Cookies
Cookies adapted from Martha Stewarts Classic Sugar Cookies, icing and technique from Not So Humble Pie blog, tasteless decoration idea all my own.
yields ~2 dozen cookies, depending on the size
Meringue powder generally requires a trip to a cake or craft shop, but carries less salmonella danger than egg whites, so its worth seeking out for the pregnant set. It also costs much more than you think powdered egg whites rightfully should, but generally comes in packages that are large enough for several batches. And once you learn how to make these cookies, you might find it hard to stop.
Cookies:
2 cups flour
1/2 tsp baking powder
1/4 tsp salt
1 stick butter, softened to room temperature
1 cup sugar
1 large egg
1 tsp vanilla extract
Icing:
1/2 lb powdered sugar
2 1/2 Tbsp meringue powder
2 Tbsp + 2 tsp water
splash vanilla, if desired
food coloring
To make the cookies:
Sift together the flour, baking soda, and salt. Set aside.
In a mixer with a paddle attachment, beat together the butter and sugar until fluffy. Add the egg and vanilla, mixing until well combined. Add the flour mixture, and stir until the dough comes together. Shape the dough into a chubby disk, cover in plastic or waxed paper, and let chill in the refrigerator until firm (at least an hour, though you can easily let it sit overnight).
When the dough is chilled, remove it from the refrigerator and let sit at room temperature for a few minutes, until soft enough to roll. Roll out on a floured surface to 1/4" thickness, and cut out your desired shapes (I used a 2.5" round cutter (or, more accurately, glass jar), which yielded cookies that fit perfectly inside a wide-mouth canning pint jar for shipping). Mush together scraps, re-roll and cut again, and repeat until all the dough is used.
Now to freeze the cookies, so that they bake evenly and provide you a smooth, non-domed icing surface: take an 8" brownie pan, line it with plastic, and place a layer of cookies in it. Repeat with more plastic and more cookies, until theyre all in. Make sure theyre laying flat. Place in the freezer until very firm, least 20 minutes.
While the cookies are chilling, preheat the oven to 325 degrees. Place the frozen cookies on prepared cookie sheets, and bake until the edges are golden, 15-18 minutes. Let cool on racks.
To ice the cookies:
In a mixer with a paddle attachment (a whisk incorporates too much air), beat together the powdered sugar, meringue powder, water and vanilla for 5 minutes. Divide the icing into bowls, and tint with food coloring until it reaches your desired shade. Add additional water until it reaches the desired consistency: if you lift up the icing and let it drizzle back from a spoon, it should be firm enough that it holds the shape of the drizzle for at least 5 seconds, but liquid enough that its totally disappeared by 10 seconds.
To ice cookies, you probably want to look at some good tutorials, such as this or this, and pipe a few practice designs on a plate before you attack the cookies. But basically, you want to put your icing into a pastry bag/makeshift paper cone, and pipe out the outline on your cookie. Let this dry for 10 minutes, and then add a bit more water to thin your icing so that you can "flood" the cookie inside the outline with some spooned-in thinned icing. Neat! You might need to poke the icing with a toothpick or skewer to guide it to the very edge of your outline. Let this base layer dry another 10 minutes.
Using another pastry bag/paper cone, pipe on decorations as you choose. If youre using multiple colors next to each other, allow another 10 minute drying session in between colors, so that they dont bleed. Allow the finished cookies to dry for several hours, preferably overnight, then pack them in a tin and send them on their way.
Friday, August 15, 2014
Flourless Chocolate Walnut Cookies
 As much as Id like to pretend otherwise, the truth is that I do not always handle disappointment with the utmost grace. Id love to be the sort who accepts bad news with a sunny shrug, and then rolls up her sleeves and moves on to the next task. But the truth is that I often spend several hours mourning the loss of Plan A before I can even think about moving on to Plan B. Which brings me to flourless chocolate walnut cookies.
This past weekend I attended a delicious Sephardic-style Passover Seder, full of saffron pilaf, Tunisian fish patties with aioli, spinach-feta minas, and good friends. My host asked if I would bring chocolate-covered matzoh caramel buttercrunch, known to all who enjoy it as matzoh crack. Its ridiculously addictive, the sort of dessert you almost dont want to make, because it is all anyone will ever you to make ever again. Well, for Passover at least.
I headed out to the grocery store with this singular vision, but couldnt find any matzoh. I figured my matzoh-finding skills must have been on the fritz, and sought out some assistance:
me: Im sorry, I cant seem to find the matzoh.
manager: Were sold out.
me: Are you joking?
manager: Why would I joke about that?
Yes, they were sold out of matzoh. On Passover. So did I cruise the shelves looking for alternate dessert inspiration? Did I phone a friend to get a shopping list for a new recipe? Of course not. I fumed out the door and biked home, composing angry letters to the grocery store management in my head all the while. Because thats helpful. And then I proceeded to reenact the above conversation to several people, both in my home and on the telephone, and share my indignation. And then I remembered Oh yeah! I still have to make dessert! Like now!
After all this attempted-matzoh-getting and protracted-hissy-fit-throwing, I didnt have time to go shopping again. Luckily I remembered a recipe Id seen a few years back for a flourless chocolate cookie studded with toasted walnuts. I had all the ingredients in my house, and the mixing and baking times were nice and short. And the cookies? Divine.
If youre seeking a chewy chocolate gluten-free (or Passover-friendly) cookie, look no further. Theyre ridiculously simple--just some toasted walnuts, powdered sugar, cocoa powder and egg whites, spiked with a bit of salt and vanilla. Because the egg whites are just stirred in rather than beaten, you end up with a cookie thats fudgey-chewy rather than meringue-crisp. Theyre glossy and chocolatey, and taste much more sinfully rich than they are. Not getting what you planned on should always be so delicious.

Flourless Chocolate Walnut Cookies
adapted from Payard, via New York Magazine
yields ~4 dozen cookies
2 3/4 cups walnut halves or pieces
3 cups confectioners (aka powdered) sugar
1/2 cup + 3 Tbsp cocoa powder (Dutched is recommended)
1/2 tsp salt
4 egg whites, at room temperature
1 Tbsp vanilla extract
Preheat the oven to 350 degrees.
Spread the walnuts on a rimmed baking sheet, and bake, stirring occasionally, until lightly golden, ~7-10 minutes (check frequently!). Let cool slightly, and coarsley chop. Set aside.
Reduce the oven temperature to 320 degrees, and line two baking pans with parchment or Silpat liners if you have, or grease well and hope for the best. Set aside.
In a large bowl, sift together the powdered sugar, cocoa powder, and salt. Add the chopped nuts, stir, and then add the egg whites and vanilla. Stir until just combined (do not overmix). Let the batter sit ~5 minutes.
Spoon the batter onto the prepared cookie sheets in heaping tablespoons (allow space--cookies will spread). Bake 14-16 minutes (rotating racks halfway through), until the tops are glossy and lightly cracked. Remove from oven, and let set a few minutes until the cookies are cool enough to remove. Remove to a rack to cool completely, and repeat with remaining batter.
Tuesday, July 29, 2014
Two Chocolate Chip Cookies

Several years ago, I was working a boring administrative job, and would often eat my breakfast and lunch at my desk. One evening, as I was washing out my little container of cereal and half-pint jar of soymilk, I wondered — why I was going through this packaging hassle (in my dishwasher-free life)? Why not save myself the trouble? The next day, I brought along a whole box of cereal, and quart of soymilk. And proceeded to eat three complete bowls over the course of the morning. Oooh, thats why.
My measure of self-restraint has grown somewhat in the intervening decade (and is no longer compounded by a soul-killingly boring job). But still. There are times I just cannot be trusted, and some sort of rationing is definitely in my best interest. Which is why I thrilled to see a recipe that yields just two chocolate chip cookies.
Make no mistake, these are nice, hefty cookies — two will more than satisfy. And they are great examples of the genre, crisp and golden on the edges, gooey and yielding on the insides. Yes, its a bit of a waste to turn on the oven for just two cookies. But cmon, we know theyre at their best in a just-baked state anyways. And if your must-eat-all-the-foods instincts kick in, well, theres really not much harm done.
Two Chocolate Chip Cookies
from the mad genius over at No. 2 Pencil
yields, well, you know
2 tablespoons of butter, softened to room temperature
2 tablespoons dark brown sugar
1 tablespoon sugar
hefty pinch of kosher salt (smoked salt, if youve got it, is also nice)
¼ teaspoon vanilla extract
1 egg yolk
¼ cup flour
1 hefty pinch baking soda
3 heaping tablespoons chocolate chips or chopped chocolatePreheat oven to 350° Fahrenheit, and line a baking sheet with parchment paper or grease it well.
In a small bowl, blend the butter with the sugars, salt and vanilla until well combined. Add the yolk and mix again, then stir in the flour and baking soda, then the chocolate.
Form into two balls, and place on the prepared baking sheet (theyll spread quite a bit, so place accordingly — you can chill the dough a bit if you want the cookies to be thicker). Bake until the edges are brown, ~8 minutes. Remove, and give the bake sheet a nice sold rap on the countertop, deflating the cookies. Let cool slightly, and enjoy.
Friday, July 25, 2014
Perfect Peanut Butter Chocolate Chip Cookies

My dog has a basket of toys by the front door. There are a few that he plays with nearly every day -- bones to gnaw and hollow rubber thingies to fill with peanut butter -- but then there are a handful that he ignores. Some promotional stuffed animal that he stopped caring about once he realized it couldnt be destroyed, or the twisted rope he liked to play tug-of-war with five years ago. Hell toss them aside to reach the more exciting items underneath, but for the most part they sit around gathering dust. Until another dog comes to the house. Magically, the value-adding property of another dogs interest renders a treat infinitely more appealing. You want that thing Ive ignored for five years? Suddenly I want it too! So much!
I laugh a bit at this transparent ridiculousness, but truth be told I can be the same way. My friend Robert once noted that somebody could be eating poop on a cracker, and hed be angling for a bite. It can happen easily. A few weeks ago, I took the cookbook Baked: New Frontiers in Baking out of the library. I thumbed through the pages, earmarking a few, thinking maybe Id make them someday. But then I saw an enticing version of Bakeds peanut butter chocolate chip cookies on the lovely blog A Little Ginger. And suddenly I wanted them too! So much!
Ive eaten my share of peanut butter cookies over the years, but these are easily the best Ive had. Hands down. Perfect cookies. They have a toothsome texture somewhere between soft and crisp, with a deep, slightly salty peanut butter flavor. They keep well, like any cookie, but I think theyre especially lovely the first day.
And speaking of ridiculous notions that consume your thoughts, I recently was so taken with the zucchini dishes I saw posted everywhere that I decided to host an All Zucchini Dinner Party. It took a bit of recipe-testing, a mountain of zucchini, and some very game friends, but in the end a good green meal was had by all. You can read about it (and get more recipes than you can shake a squash at) in The Oregonian.

Perfect Peanut Butter Chocolate Chip Cookies
adapted from Baked: New Frontiers in Baking
yields ~36 cookies
1 3/4 cups flour
2 tsp baking soda
1 tsp salt
1 cup (2 sticks) unsalted butter, softened to room temperature
1 cup granulated sugar, plus more for topping
1 cup packed brown sugar
2 eggs
1 tsp vanilla
1 cup peanut butter
6 oz chocolate, milk or dark, coarsely chopped
In a medium bowl, sift together the flour, soda and salt. Set aside.
In a mixer, cream together the butter and sugars until light and fluffy. Add the eggs one by one, mixing until combined. Add the vanilla and peanut butter, mixing until well combined.
Fold in the dry ingredients until *just* combined. Fold in the chocolate bits, and place in a covered container and refrigerate overnight.
On baking day, remove the dough from the refrigerator, and preheat the oven to 375 degrees. Plop out rounded tablespoons of dough onto lined cookie sheets, at least 2" apart, and flatten slightly with the heel of your hand to smush the doughballs into chubby disks. Sprinkle a bit of granulated sugar on each cookie, enough to give a light dusting (this will make a lovely, sweet-crunchy crust).
Place sheets in oven and bake 10-12 minutes, until the edges just turn golden brown. Remove from oven, let cool on the sheet for 5 minutes, and then remove to finish cooling on a rack. Enjoy.
Saturday, July 5, 2014
Brown Butter Chocolate Chip Cookies

Time can be one of your best friends when cooking. A few hours of a hands-off simmer can turn a pot of vegetables and water into a deeply flavorful soup. And an overnight slow rise can turn out loaves of home-cooked bread that can hold their own against your local artisan boulangerie. And it turns out that the same holds true for sweets. Last year, The New York Times ran an article profiling what they deemed the definitive chocolate chip cookie recipe, which the blogosphere resoundingly endorsed. The recipe seems pretty standard, with the usual players of creamed butter, brown and white sugars, flour, leavening, vanilla and chocolate. But then it instructs you to set your batter back in the refrigerator. For a full day. Or even two. The resulting cookies sport a caramel-like sophistication, handily beating out their less-mature brethren in taste tests.
Now, Im all for richly complex baked goods. But sometimes time isnt on your side. Sometimes you want to whip up a batch of chocolate chip cookies to share with your friends who are about to board a plane (and to console yourself after their departure). But yet you still crave toffee-like layers of flavor, a step above the standard wan Tollhouse variety. At times like these, theres brown butter.
Brown butter, or beurre noisette if youre feeling French, is simply butter thats been heated until the milk solids separate out and darken. The French name translates to "hazelnut butter," which aptly describes the toasty, nutty flavor that this process imparts. Its your quickest shortcut to the deep, complex flavors that usually take hours to develop. Yes, theres a small bit of fuss. Youve got to swirl the pan a bit as the butter melts, to ensure even heating, and make sure to use a light colored pot so that you can see the butter darkening, and dont miss the brief window before it becomes bitterly burnt. But isnt that easier than twiddling your thumbs for several days, while delicious cookie dough calls to you from the refrigerator with its siren song?

Brown Butter Chocolate Chip Cookies
adapted from Cooks Illustrateds Perfect Chocolate Chip Cookies
yields 16-24 cookies, depending on the size
1 3/4 cups flour
1/2 tsp baking soda
1 3/4 sticks unsalted butter
1/2 cup sugar
3/4 packed brown sugar
1 tsp salt
1 tsp vanilla
1 egg
1 egg yolk
1 1/4 cups chocolate chips
Preheat an oven to 375 degrees.
Sift together flour and baking soda, set aside.
Place 10 tablespoons butter in a heavy-bottomed saucepan or skillet. Heat over medium-high until the butter melts. Continue to cook until the butter is a deep golden brown, swirling the pan constantly (~1-3 minutes). Pour thebrown butter into a large bowl, and immediately add the remaining 4 tablespoons of reserved butter. Let sit, swirling occasionally, until the remaining butter has melted.
When all the butter has melted, add the sugars, salt and vanilla to the bowl, and whisk to combine. Add the egg and egg yolk. Whisk until the mixture is smooth, ~30 seconds, and then let sit for 3 minutes. Repeat the whisking and resting two more times. The sugars will begin to dissolve, and the mixture will become thicker, shiny and lighter in color.
Stir in the flour mixture until just combined, and fold in the chocolate chips. Scoop balls of dough onto a prepared cookie sheet, using 2-3 tablespoons of dough (depending on how large you like your cookies). Bake, one sheet at a time, until the edges are beginning to get golden, but the centers are still puffy and soft (8-14 minutes, depending on cookie size and oven temperature).
Cool on a rack.
Wednesday, June 18, 2014
Macaroons with Chocolate Ganache and Almonds aka Almond Joy Cookies

I recently received a package from a friend who is traveling in Africa. The brightly-colored fabric-backed painting was lovely, but honestly I was probably just as thrilled by the basic fact of the envelope as by its contents. Care package! Foreign stamps! Hand-written letter! Getting mail is so exciting!
These days, its possible to go years without receiving a little homemade postal love. Unless youre sharing grocery lists, you might not know what someones handwriting even looks like. Theres the mass-produced holiday card, or the wedding thank-yous written out by the dozens, but honestly its not the same. A care package, lovingly assembled in another city and posted out to you, is such a thrill. I give and receive them all too infrequently.
But when I do, the question remains: what to send? The shelf-stable particulars vary based upon the recipient, but Im almost always looking to include a little handmade sugar as well. Unfortunately, it can be hard to find the right cookies to send. Chocolate chip cookies and brownies are great fresh from the oven, but unless youre a starving college student, youre probably not going to want them six days later. Things like gingerbread or biscotti, dried out to a long-term-storage crisp, work well. But recently I pulled together a package for someone in need of a little pick-me-up, and demure crunchy tea cookies werent going to do. I wanted something a little more gooey, more chocolatey and indulgent, but still delicious after spending the better part of a week in transit. Fortunately, I discovered these macaroons.
This recipe produces a showstoppingly good cookie. Fresh out of the oven, youre struck by the moist, rich coconut filling, gently toasted to a crisp on the outside. And to make matters even better, this richness is offset by a bittersweet fudgey ganache. I was compelled to take it even further, adding a sprinkling of toasted almonds, and the lightest dusting of coarse salt to bring out the sweetness. They ship well (having no delicate edges to break off in the mail), and even a few days later still taste like a candy bar. If you really want to play up the similarity, you can omit the chopped nuts, and hide a single toasted almond beneath the ganache. These macaroons are my new favorite for shipping off across the country (or hiding away in my very own freezer).

Macaroons with Chocolate Ganache and Almonds (aka Almond Joy Cookies)
adapted from a recipe that Bon Appetit adapted from Marigold Kitchen, with thanks to Orangette for flagging
makes ~ 4 dozen
Cookies:
3 cups (lightly-packed) sweetened shredded coconut
3/4 cup sugar
3/4 cup egg whites (about 6)
pinch salt
1 1/2 tsp vanilla
1/4 tsp almond extract
Ganache and Topping:
9 oz bittersweet or semisweet chocolate, chopped
6 Tbsp heavy whipping cream (if shipping, reduce to 3 Tbsp for a firmer set)
1 Tbsp corn syrup (optional, but gives a nice gloss to the finished ganache)
~1/4 cup chopped and toasted almonds
coarse salt for sprinkling (optional)
Mix together the coconut, sugar, egg whites and salt in a heavy-bottomed saucepan. Cook over medium heat, stirring constantly once it warms. The mixture will gradually dry out and become less loose and gooey, and more of a sticky paste (~12 minutes). Remove from heat, and stir in the vanilla and almond extracts. Spread out in a thick layer on a cookie sheet, and refrigerate until cold, ~1 hour (you can also place in a sealed container and allow to sit in the refrigerator overnight).
When the dough is chilled, preheat the oven to 300, and line a couple baking sheets with parchment.
Take the chilled dough, and shape into packed, mounded heaping tablespoons (a mini ice-cream scoop is ideal for this). Place the cookies on the prepared baking sheets (they wont spread, so you dont need to space them too far apart). Bake until the coconut on the outside begins to get golden, ~20-30 minutes. Remove, let set on the sheet for a few minutes to firm up, and then transfer to a rack to cool completely.
When the cookies are cool, prepare the ganache. Place the chocolate, cream and corn syrup in double boiler, and heat until the chocolate is almost entirely melted. Remove from heat, and whisk until smooth. Spoon the glaze over the macaroons, allowing it to form little chocolate hats and drip down thickly over the sides. Sprinkle with toasted almonds, and, if desired, just a few grains of coarse salt (you can lightly press down any sticking-up almonds to make sure they are fully anchored in the ganache). Refrigerate until the ganache fully sets (at least two hours), then transfer to an airtight container. Store in the refrigerator or freezer, or ship off to the loved one of your choosing.
Tuesday, May 27, 2014
Chocolate Chip Cookies with Rye Flour

Yes, I have promised you stories of European adventure. And yes, there are constant reminders that I am far from Portland. Traditional dancers and musicians piped their way through the streets shortly after I dropped my bags. Breakfast consists of bowls of milky sweet coffee, with crusts of last night´s bread crumbled in. I have held five-day-old rabbits that peed in my hand, and politely declined the offer of a walking stick during a farm stroll, only to be informed that it was in fact a pushing-back-cows stick. I will be terribly sad to leave.
But as for cooking, and taking pictures of said food, I´ve been a bit remiss. And it´s not for lack of amazing food. The first evening brought a lovely potato tortilla and croquettes, but after 18 hours of travel I wasn´t really following what was happening. Last night I ate dinner that was cooked on an actual wood-fired stove, but given that my inability to speak Basque was enough of an imposition, I decided not to make things worse by sticking my camera around. I promise salt cold aplenty to come, but for now, I´ll tell you about the snacks I baked in Portland and carried with me.
If you´re looking to represent America abroad, it´s hard to go wrong with chocolate chip cookies. And if you´re looking to make chocolate chip cookies, it´s hard to go wrong with a buttery dough, aged for a few nights in the fridge. And, per my latest obsession, bolstered with rye flour.
When this chocolate chip cookie recipe first surfaced, it seemed like perfection. Take the usual easy-peasy formula, wait a few days, and almost by magic the dough develops a caramel-like depth. But after writing an article about the wonders of rye flour, I couldn´t help but swap some into this formula (cutting the amount down just a wee bit, to account for the moisture-absorbing prowess of rye´s whole grain). And the result is just lovely, my all-time favorite. It has been politely demanded that I bake more before my departure. If only the Basque Country sold rye flour...

Chocolate Chip Cookies with Rye Flour
adapted from Jacques Torres in The New York Times
yields 2-4 dozen cookies, depending upon size, and must be made at least 1 day before baking
4 1/4 ounces bread flour, 1 1/3 cups (I feared this could yield a tough consistency, but it´s called for in the original, and nicely offsets rye´s minimal gluten, though it´d probably be fine without)
4 ounces rye flour, 1 heaping cup
1/2 tsp baking soda
3/4 tsp baking powder
3/4 tsp coarse salt
10 Tbsp unsalted butter, softened to room temperature
5 ounces (2/3 cup) brown sugar, packed
4 ounces (1/2 cup plus 1 Tbsp) granulated sugar
1 large egg
1 tsp vanilla
1 4-ounce bar (or more) chocolate of your choosing, chopped into small cubes and bits
Sift together the bread flour, rye flour, soda, powder and salt. Set aside.
Place the butter in a mixer or large bowl, and beat together with the sugars until very light. Add the egg and vanilla, and stir until well combined. Add the flour mixture, stir until just mixed, and then add the chocolate and stir to distribute evenly. Place in a bag or covered container, and chill 2-3 days.
When you´re ready to bake, preheat your oven to 350 degrees, and line a few baking sheets with parchment (or grease them well and hope for the best). Scoop the dough out into cookies -- Torres favors large cookies for a nice crisp-outside-gooey-inside consistency, but I find you can arrive at something similar if you make small cookies and watch them like a hawk.
Bake until golden brown yet soft, 10-15 minutes depending upon cookie size. Let the cookies cool on the sheet for a couple minutes until they firm up enough for you to move them, then transfer to a rack to cool completely (it´s difficult to end up with soft cookies if you don´t pull them soon enough). Devour when warm, with milk, or let cool fully and pack them in an airtight container for your travels.
Sunday, May 25, 2014
Chewy Chocolate Chocolate Chip Cookies

At Thanksgiving about a decade ago, my friends 3-year-old nephew was "helping" with the meal. After the dessert plates had been set out, he carefully began laying out a cookie on each plate. An elderly relative tried to halt him, gently explaining that not everyone wanted a cookie. This was mind-blowing information for a 3-year-old to incorporate. "Why dont they want a tookie?" he asked incredulously. "Its just a tookie. Its just sweet."
Even though Ive got something of a grown-ups palate these days (i.e. I no longer dream about purchasing a can of frosting for a birthday meal), I feel the same way about these cookies. Some other desserts, sure. There are desserts for particular palates, or suited to particular meals or seasons. But these cookies are always perfect. Always. Theyve got a thin crisp outer covering which cracks in crags, letting you see the moistness inside. I cant think of the last time I baked cookies that werent these.
Amazingly, this recipe is vegan, missing the eggs and butter which normally give cookies body and flavor. But you would never know. Theyre soft and chocolaty, deeply-flavored and studded with chips. If you know a vegan, or someone who has to avoid dairy, make them these cookies. And if you have friends who do indulge in dairy, they wont know the difference. I know, I know: many vegan and dairy-free recipes make similar claims, but leave you with cookies that crumble, dont spread, or feature a distracting soy or margarine flavor. I promise, these cookies just taste like great cookies. And who doesnt want a cookie?

Chewy Chocolate Chocolate Chip Cookies
adapted from Isa Moskowitz, The Post-Punk Kitchen
makes 4 dozen cookies
In order for you to have nice chewy cookies, youll need to make sure these cookies dont cook beyond 10 minutes. Theyll seem a bit under-done at first, but theyll continue to set outside of the oven. This recipe is easily halved if you dont want the full yield. But you know whats a better idea? Bake the full amount, then freeze any leftovers for a secret stash. We thaw ours in the microwave, but Ive been known to gnaw still-frozen cookies.
4 tsp ground flax seeds (ground to a mealy powder in a spice grinder)
1/2 cup milk or soymilk
2 cups all purpose flour (or finely-milled whole wheat pastry flour)
3/4 cups cocoa powder
1 tsp baking soda
3/4 tsp salt
3/4 cup neutral oil (like canola)
2 cups sugar
2 tsp vanilla
1 cup chocolate chips
Preheat oven to 350 degrees. Whisk together flax seeds and soymilk, and let sit at least ten minutes (IMPORTANT: this allows the flax seeds to release whatever it is they release into the milk, which binds the cookies into a nice chewy consistency. If they dont sit long enough, youll have disappointingly flat cookies).
In a large bowl, sift together flour, cocoa powder, baking soda and salt. Set aside.
Whisk together oil, sugar and vanilla. Add the flax mixture, and mix well. Fold in the dry ingredients in a few additions, being careful not to overmix. Add chocolate chips.
Form the dough into cookies, either by forming 1" balls with your hands, or scooping them out with a tiny ice cream scoop. Place on a cookie sheet (no need to grease), leaving 1" between cookies. Bake 10 minutes -- no longer! Let set on the sheets for 5 minutes, then move to a wire rack or plate to cook completely.
Sunday, May 11, 2014
Pistachio Pudding with Chocolate Cookies

Neither pistachios nor pudding get the respect they truly deserve. To whit: order a pistachio-flavored dessert, and you will invariably be served something thats almond-flavored. But colored green, see, so its pistachio (to give props, this realization was attributed to the amazing pastry chef Shuna Lydon). And pudding -- according to a friend, in Turkey you can find entire restaurants devoted to pudding. Just pudding. It boggles the mind. Stateside, unless you count its fancy euro-sounding cousins of mousse and pot-de-creme, pudding isnt likely to make it onto the dessert menu at all. Most of the time, its served in individually-sealed plastic snack cups, or plopped out of industrial-sized tubs onto cafeteria trays. This is all a shame, because both pistachios and pudding have a lot to offer by the way of dessert. Especially when they are combined together.
This sweet combination has all I look for in a final course. The pudding is rich, deep and smooth, with a true pistachio flavor (I was worried that the cinnamon would overpower, but it just serves to deepen the pistachios aromatic notes). It is a bit thick from the ground nuts, so the sweet blob of whipped cream provides a welcome lightness. And then the cookies lend a delicious snap and bittersweet edge (I reduced the sugar a bit, upon advice from Smitten Kitchen), as well as their basic chocolatey goodness (which we all kinda want from a dessert anyways). Its a pudding fancypants enough to serve at your next dinner party. Its a pudding that might just redeem pudding (and pistachios) forever.

Pistachio Pudding with Chocolate cookies
pudding adapted, somewhat heavily, from Cookshop, as told to the Amateur Gourmet, cookies adapted from Retro Desserts, as flagged and adapted by Smitten Kitchen
yields ~6 portions puddings, and ~2-3 dozen cookies
For the Cookies:
1 1/4 cups flour
1/2 cup dutched cocoa powder
1 tsp baking soda
1/4 tsp baking powder
1/4 tsp salt
1 cup sugar
1 1/4 sticks (10 Tbsp) unsalted butter, softened to room temperature
1 egg
Preheat the oven to 375 degrees. Line a few cookie sheets with parchment paper, or grease them well and hope for the best.
Place the flour, cocoa powder, soda, baking powder, salt and sugar in the bowl of a food processor or mixer. Pulse or mix a few times to combine the dry ingredients. Add the butter and egg, and pulse or mix a few times until it just comes together.
Scoop tablespoons of the mixed dough onto the prepared cookie sheets, leaving some space between cookies (these will spread). Flatten slightly, wetting your hand if needed to keep the dough from sticking. Bake for ~9 minutes, until just set. Let them cool on the sheet for a minute or two to set, then remove to a rack to cool completely.
For the Pudding:
4 cups cream, divided
2 cups milk
2 cups toasted pistachios
2 sticks cinnamon
1 cup sugar, plus more for the whipped cream
3 Tbsp cornstarch
vanilla to taste
Place 3 1/4 cups of the cream (set aside the remainder in the refrigerator), the milk, pistachios and cinnamon in saucepan. Bring to a simmer, then turn off the heat and allow to steep for 1/2 an hour. Get some cups ready for the finished pudding.
When the cream/pistachio mixture has steeped, blend it fully, and then strain it back into the saucepan (I had to sort of persuade it through the strainer with a spatula, clearing out the nutty detritus a couple of times during the process, but results may vary depending upon your blender and strainer). Whisk together the sugar and cornstarch in a bowl, and then add enough of the strained cream mixture to create a smooth paste. Whisk in the remainder, then pour it back into the pot. Heat over a medium flame, whisking, until it comes to a boil. Lower the heat until it just maintains a simmer, and simmer, whisking constantly, for 3 minutes. Pour into cups in your desired amounts, and chill.
Before serving, whip the remaining cream into soft peaks, and add sugar and vanilla to taste. Top the pudding with whipped cream, and serve with a chocolate cookie (or three).
Thursday, May 8, 2014
How to Make Danish Medal Cookies With A Pastry Cream Filling Medaljer Kage Opskrift
These cream cakes (Medaljer) are very common in Danish bakeries and homes. These are made in countless variations. The primary ingredients are the cookies, custard, whipped cream, and icing. Below is the recipe for each of the primary ingredients. Once each item is made it just requires assembling to make a delicious treat. First step is make the cookie
Cookie Ingredients:
- 1 1/4 cups of flour
- 3 tablespoons of powdered sugar
- 1 egg
- 5 tablespoons of softened butter
- bowl wooden spoon
- pastry blender
- measuring cup
- rolling pin
- baking tray
- parchment paper
Cookie Preparation
Combine sifted confectionery sugar and flour in a large mixing bowl. Mix well by hand or with a wooden spoon. Add softened butter and knead with either a wooden spoon or a pastry blender. Next add one egg and mix the mixture with a wooden spoon Continue mixing the dough. Use your hands to form a smooth round ball of dough. Wrap in plastic wrap and chill in the refrigerator for one hour.
Preheat oven at 400F. Roll dough on lightly floured work surface to 1/4 or 1/8" thickness. Cut into round cookie shapes with medium-sized wineglass or a cookie cutter. Bake on a greased baking sheet or lined with parchment paper for about 8 minutes or until pale golden brown. Place on the center of the oven rack and bake at 4oo degrees
Remove to a wire rack to cool. Can be kept in an airtight container until needed.
Custard As a Pastry Cream for the Medal Cookies - Creme budding opskrift
Custard Ingredients:
- 2 cups of milk
- 2/3 cups of flour
- 2 eggs
- 3/4 cup of sugar
- 1 teaspoon of vanilla
- 1 tablespoon of butter
- pinch of salt
- kitchen pot
- large bowl
- measuring cup
- wooden spoon
Custard Preparation
Heat milk over the stove at medium heat. Do not boil the milk. Combine sugar, flour, salt and the two eggs in a bowl Mix the mixture in the bowl. Add a little of the egg-sugar-flour mixture to the warm pot of milk that is on the stove. Pour a little more of the mixture into the warm milk, stirring constantly. Stir constantly to avoid the custard becoming lumpy and to prevent it from burning. When the custard has thickened pour it into a bowl. Next add the butter and stir it into the warn mixture. Then add vanilla into the milk mixture. You dont want the vanilla to boil. So the vanilla should be added last.
Cover over the bowl of custard with plastic wrap. Place the bowl in the fridge at least two hours. You can sprinkle sugar over the custard while cooling so that a skin will not form too. Cool custard completely in the refrigerator - a minimum of 2 hours.
Icing Ingredients:
- 1 cup of confectionary sugar
- a glass of water
- almond flavoring (optional)
- food coloring (optional)
Kitchen utensils
- bowl
- spoon
- measuring cup
Sift powdered sugar into a bowl. Add a couple of tablespoons of water into the sugar. Stir until a smooth mass is obtained. If need be, add a couple more drops of water. Optional add flavoring or food coloring. Color and taste can be varied by mixing in lemon flavoring, cocoa. etc.
Assembly:
When the cookies and the custard are cool, we are ready to assemble all of the primary ingredients.
Choose half of the nice cookies to be the tops. Glaze half of the cookies with the sugar icing using a knife. Let the glaze stiffen.
Next on the other cookie use a pastry bag to pipe out whipped cream to create a circular boarder or a ring on the edge of each cookie. Fill the center of the cookie with the custard using a spoon. The whipped cream ring holds the custard in.
Place the glazed cookie glazed side up on top of the custard. Garnish with a dab of whipped cream over the glazed cookie. Add a fresh fruit such as strawberries or blueberries on top.
Refrigerate until serving. Serve the same day !
Sesame Coated Chocolate Chip Cookies

The past day or so, I have been craving a good old-fashioned chocolate chip cookie. And then I saw a picture, and suddenly I was craving a good new-fangled chocolate chip cookie. With a coating of sesame seeds. And, hidden underneath, just the merest whisper of clean, fresh ginger, and the salt jolt of soy sauce. Who knew there could be an improvement upon the chocolate chip cookie?
This brilliant sesame-studded idea came from Joy the Baker. She tucks some seeds inside, but I like the idea of the standard smooth dough-and-chocolate cookie on the inside (I swapped in my current favorite recipe), with a crunchy, nutty coating on the outside. And I love the idea of using soy sauce instead of salt for a slightly malty Asian spin (I also added a bit of ginger, after loving the combination in these sesame-ginger rice krispie treats). The flavors in these cookies are fairly subtle—they dont knock you over the head with gingery heat, or a wow-thats-salty hit of soy-based umami. Theyre just a classic chocolate chip cookie, with all of the goodness that entails, given a slight tweak. And a coating of crunchy sesame seeds. And theyre really, really good.

Sesame-Coated Chocolate Chip Cookies
combination inspired by Joy The Baker, recipe tweaked from Jacques Torres in The New York Times
yields 2-4 dozen cookies, depending upon size, and must be made at least 1 day before baking
8 1/2 ounces flour (scant 2 cups) — substitute up to a (slightly scant) quarter rye or whole wheat pastry flour
1/2 tsp baking soda
3/4 tsp baking powder
10 Tbsp (5 ounces) unsalted butter, softened to room temperature
5 ounces (2/3 cup) brown sugar, packed
4 ounces (1/2 cup plus 1 Tbsp) granulated sugar
1 large egg
1 tsp vanilla
1 tsp soy sauce
1 1/2 tsp ginger juice (its easiest to grate the ginger, then press it through a garlic press to extract the juice)
6 ounces chocolate of your choosing, chopped into small cubes and bits (~1 cup)
~1/2 cup black sesame seeds
coarse salt (optional)
Sift together the flour(s), soda, powder and salt. Set aside.
Place the butter in a mixer or large bowl, and beat together with the sugars until very light. Add the egg, vanilla, soy sauce, and ginger juice, and stir until well combined. Add the flour mixture, stir until just mixed, and then add the chocolate and stir to distribute evenly. Place in a bag or covered container, and chill 2-3 days.
When youre ready to bake, preheat your oven to 350 degrees, and line a few baking sheets with parchment (or grease them well and hope for the best). Scoop the dough out into cookies of the size you prefer — large, 3-inch balls of dough easily make for a nice crisp-outside-gooey-inside consistency, but I find you can arrive at something similar if you make small cookies and watch them like a hawk. Roll in the sesame seeds to give a fairly heavy coating, and place on the prepared sheets. If you fancy a bit more salt in your sweet, you can also top each cookie with a whisper of coarse salt.
Bake until golden brown on the edges yet soft, 10-15 minutes depending upon cookie size. Let the cookies cool on the sheet for a couple minutes until they firm up enough for you to move them, then transfer to a rack to cool completely (its difficult to end up with soft cookies if you dont pull them soon enough). Devour when warm, with milk (or, if youd like to keep with the theme, soymilk).
Chocolate Cinnamon Cookies

Recently a reader expressed an interest in a vegan version of this rich pistachio pudding. Despite its dairy-filled indulgence, that recipe actually lends itself fairly well to veganizing: the ground pistachio contribute a richness that compensates for any less-than-creamy faux-creams you want to swap out, and its thickened with a cornstarch slurry instead of eggs. But the problem comes in putting together the whole package: part of the puddings perfection comes in pairing it with bittersweet snappy-crisp chocolate cookies, to offset all that smooth. And so, heres an alternative: a dairy-free, egg-free, snappy-crisp chocolate cookie. Dont say I dont aim to please.
The recipe comes from the doyenne of vegan cookies, Isa Moskowitz. She introduced these as Mexican hot chocolate snickerdoodles, but due to my disagreements with cayenne, I ended up just adapting them as a regular ole chocolate cookie. But they are still quite exciting. The texture is perfect, crisp-but-not-too-crisp, and they crackle beautifully in the oven. The bit of cinnamon in the dough (and in the cinnamon-sugar dusting it gets before the oven) doesnt overwhelm the cookie, but nicely complements the chocolate flavor. Theyre perfect for enjoying with a cold glass of milk (or soymilk), sandwiching with some summer ice cream (or soycream), or dunking into a dish of rich, smooth pudding.

Chocolate Cinnamon Cookies
adapted from Isa Chandra Moskowitz, from her book Vegan Cookies Invade Your Cookie Jar
yields ~4 dozen cookies
Topping:
1/3 cup sugar
1 tsp cinnamon
Cookies:
1 2/3 cup flour
1/2 cup cocoa powder
1 tsp baking soda
1/2 tsp salt
1/2 tsp cinnamon
1/2 tsp cayenne (optional, for a spicy cookie)
1/2 cup canola oil
1 cup sugar
1/4 cup maple syrup
3 Tbsp milk (or soymilk)
1 tsp vanilla extract
Preheat the oven to 350 degrees. Line two baking sheets with parchment paper, or grease well.
Mix together the cinnamon and sugar for the topping in a small dish, and set aside.
In a bowl, sift together the flour, cocoa powder, baking soda, salt, cinnamon and cayenne (if using). Set aside.
In a mixer or large bowl, mix together the oil, sugar, maple syrup, milk and vanilla until well combined. Add the dry ingredients, stirring until dough comes together.
Scoop out tablespoons of dough (a mini ice-cream scoop makes this ridiculously easy, though it can also be done with two spoons), and plop them into the dish of cinnamon-sugar. Roll around to coat, then transfer to the prepared cookie sheets. Repeat with the remaining dough, leaving ample space for the cookies to spread. Press on each cookie to flatten it into a not-too-thick disc (a little thicker than the finished cookie, as they will continue to spread in the oven). Transfer to the preheated oven and bake ~10 minutes, until the cookies have spread and gotten crackly on top (they wont be entirely set). Remove, and let cool on the cookie sheet for 5 minutes, until firm enough to transfer. Move to a cool rack to cool completely.
Subscribe to:
Posts (Atom)